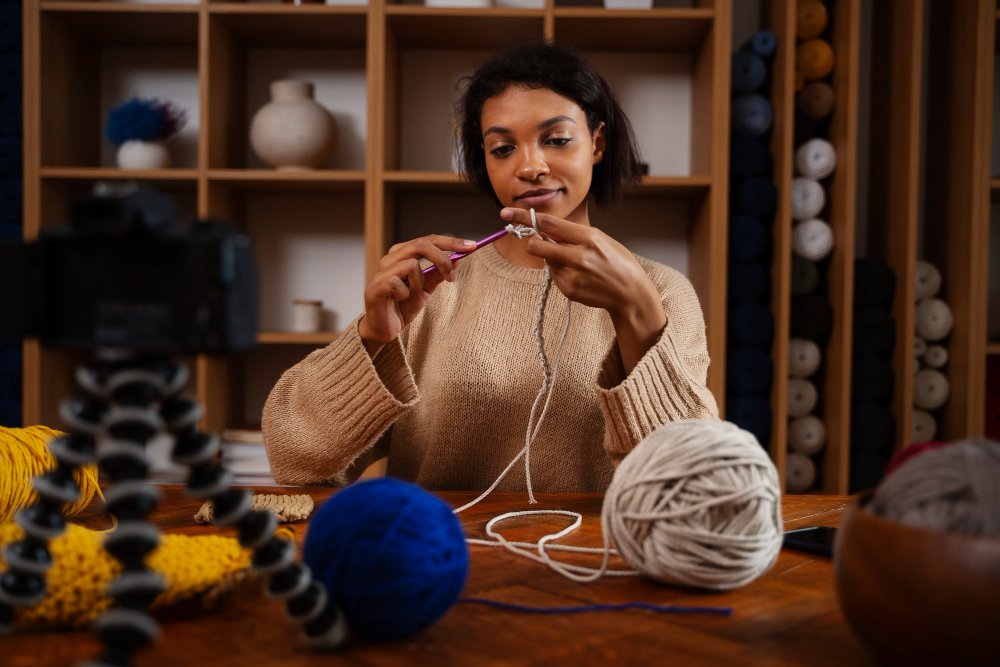
Crochet is one of those skills that can look complicated when you see someone making a detailed blanket, bag or clothing item, but starting is much simpler than it appears. You do not need a room full of supplies or years of experience to begin. With one crochet hook, suitable yarn, scissors and a little practice, you can learn the basic stitches and make your first small project.
The biggest mistake beginners make is trying to learn too much at once. You do not need to know dozens of stitches before you can make something useful. This guide will take you from choosing your first hook and yarn to making a slip knot, creating chains, working single crochet, fixing common mistakes and completing your first crochet project.
Step 1: Get the Basic Tools You Need to Start Crochet
You only need a few things to start crochet. The most important items are a crochet hook, yarn, a small pair of scissors and a tapestry or yarn needle. You can add other tools later as your projects become more complicated, but these basics are enough to begin learning.
Your crochet hook is the tool you use to pull yarn through loops and create stitches. For a beginner, a 5 mm or 5.5 mm hook is a good starting point because it works well with medium-weight yarn and creates stitches that are large enough to see. A simple aluminium hook is perfectly fine, so there is no need to spend a lot of money on an expensive hook when you are just learning.
You also need yarn that is suitable for beginners. Scissors are used to cut the yarn when you finish a project, while a blunt-tipped tapestry needle is used to hide loose yarn ends inside your finished work. Stitch markers, a tape measure and a project bag can be useful later, but you can learn the basics without them.
Do not feel pressured to buy a complete crochet set because you think you need every hook size and accessory immediately. One suitable hook and one ball of yarn can give you enough material to practise for quite some time. In fact, keeping your first setup simple can make learning easier because you can concentrate on the technique instead of worrying about equipment.
Step 2: Choose the Right Crochet Hook
Crochet hooks come in different sizes, and the size affects how large your stitches will be. Smaller hooks are normally used with thinner yarn, while larger hooks are used with thicker yarn. The yarn label usually gives you a recommended hook size, which is a useful place to start.
For your first crochet lessons, a 5 mm hook, also called US H-8, or a 5.5 mm hook, also called US I-9, is a practical choice. These sizes work well with medium or worsted-weight yarn and make stitches easy enough for a beginner to see. They also give you enough space to insert the hook without having to fight with very small loops.
Aluminium hooks are particularly good for beginners because they are affordable, durable and smooth. Bamboo and wooden hooks can feel warmer and provide slightly more grip, while plastic hooks are lightweight and inexpensive. Ergonomic hooks with larger handles can be more comfortable if you crochet for long periods, but you do not need one to learn.
There is also no need to buy a complete hook collection before you understand how different sizes work. Start with one suitable hook, learn the basics and add other sizes when a project requires them. As you gain experience, you will naturally learn which hook sizes and styles feel most comfortable in your hands.
Step 3: Choose the Right Yarn for Your First Project
Choosing the right yarn can make a huge difference when you are learning crochet. The best yarn for most complete beginners is smooth, medium-weight yarn, commonly labelled as #4 Medium or Worsted Weight. It is thick enough for you to see the stitches clearly without being so thick that the hook becomes difficult to control.
Acrylic yarn is a practical choice for learning because it is usually affordable, durable and easy to work with. It can also be unravelled when you make a mistake, allowing you to reuse the yarn for practice. Cotton is another useful option, especially for projects such as dishcloths and washcloths, although it can feel less forgiving because it does not have the same stretch as many acrylic yarns.
The colour of your yarn matters too. Light-coloured yarn such as cream, pale blue, light grey or pastel shades makes it much easier to see the individual loops and stitches. Dark yarn, especially black or very dark blue, can make it difficult to see where the hook should go, particularly when you are still learning to recognise stitches.
You should also avoid fuzzy, hairy, highly textured or novelty yarn when you are starting. These yarns can hide the structure of your stitches and make it difficult to tell whether you have inserted your hook in the right place. Very thin yarn can also be frustrating for a beginner, while extremely bulky yarn can make controlling the hook and yarn awkward.
One ball or skein is enough when you are learning. You can make a practice piece, pull it apart and use the yarn again, so there is no reason to buy a large supply before you know what you are doing. Once you have learned the basics and chosen a project, you can then buy the amount and type of yarn that the pattern requires.
Step 4: Learn How to Read a Yarn Label
Yarn labels contain useful information that can help you choose the right yarn for a project. The label normally tells you the yarn weight, fibre content, recommended hook size, length, weight and care instructions. Learning to understand these details will make choosing yarn much easier as you become more experienced.
The yarn weight tells you how thick the yarn is. The common numbering system runs from 0 for very fine lace yarn through to 7 for extremely thick jumbo yarn, with #4 Medium being a particularly useful starting point for beginners. You will often see words such as “medium”, “worsted” or “Aran” on labels, although the exact terminology can vary by country and manufacturer.
The label will also show the recommended crochet hook size. This does not mean you must always use that exact size, because the correct hook can change depending on the pattern and the type of fabric you want, but it gives you a sensible starting point. When you are learning, following the hook recommendation on a suitable #4 yarn can save you from making the process unnecessarily difficult.
Pay attention to the fibre content as well. A label may say 100% acrylic, 100% cotton or a mixture of different fibres, and this information tells you how the finished item is likely to behave and how it should be cared for. If you are buying several balls for one project, check the dye lot too, because yarn from different dye lots can have slightly different colours even when the label shows the same colour name.
Step 5: Learn How to Hold the Crochet Hook and Yarn
There are two common ways to hold a crochet hook, known as the pencil grip and the knife grip. With the pencil grip, you hold the hook in a way that resembles holding a pencil, while the knife grip involves holding it more like a dinner knife. Neither method is automatically the correct one, so use whichever feels comfortable and gives you good control.
Your other hand controls the yarn and helps you maintain tension. Many crocheters wrap the yarn around one or more fingers and allow it to pass over the index finger before reaching the hook. This may feel awkward at first, but your hands will gradually learn how much pressure to use.
Tension simply refers to how tightly or loosely you hold and pull the yarn while making stitches. If you pull the yarn too tightly, it can become difficult to insert the hook into the stitches and your finished fabric may become stiff. If you hold it too loosely, your stitches may become very large and uneven.
Do not spend your first few sessions trying to achieve perfect tension. Your main goal should be to make the yarn move smoothly and keep your stitches reasonably similar in size. Tension normally improves through repetition because your hands begin to develop muscle memory.
Step 6: Learn How to Make a Slip Knot
The slip knot is usually the starting point for a crochet project. It creates the adjustable loop that sits on your hook before you begin making your first chain. Once you understand the movement, you will probably be able to make one without thinking about it.
Start by leaving a yarn tail of about 10 to 15 centimetres. Make a loop with the working yarn, insert your hook through the loop and pull the working yarn through to create a new loop on the hook. Gently pull the yarn tail or working yarn until the knot becomes snug around the hook.
Do not tighten the slip knot too much. The loop should be secure enough to stay on the hook while still being able to slide along it. If the loop is extremely tight, your next stitches will become harder to make.
Do not worry if your first few attempts look strange. Making a slip knot is a simple movement, but it can feel unfamiliar because your hands are doing something they have never done before. Make several of them until the movement starts to feel natural.
Step 7: Learn How to Make a Chain Stitch
The chain stitch is the first basic crochet stitch you should practise after learning the slip knot. It forms a row of linked loops and is used as the foundation for many crochet projects. Learning to make even chains will make the next stage of learning much easier.
With the slip knot on your hook, hold the yarn with your other hand and wrap the working yarn over the hook. This movement is called a yarn over. Pull the hook through the loop already on the hook, and you have made one chain stitch.
Continue making chains by repeating the same movement. As you make them, you should begin to see a series of small V shapes forming along the yarn. Try to keep the chains similar in size rather than pulling each one as tightly as possible.
The loop currently sitting on your hook is not counted as a completed chain. If you make 20 chains, you should be able to identify 20 completed V-shaped chains below the hook. Practise making chains of around 15 to 30 stitches until you can create a reasonably even foundation.
Step 8: Learn How to Make a Single Crochet
Once you are comfortable making chains, it is time to learn single crochet. In US crochet terminology, single crochet is abbreviated as sc, and it is one of the most useful stitches for beginners. It creates a fairly dense fabric and appears in many simple crochet projects.
Start by making a foundation chain. To make the first single crochet, insert your hook into the second chain from the hook, leaving the first chain unworked. Yarn over and pull the yarn back through the chain, giving you two loops on the hook.
Yarn over once more and pull the yarn through both loops on the hook. You have now completed one single crochet stitch. Continue inserting the hook into the next chain, yarning over, pulling up a loop, yarning over again and pulling through both loops.
The top of a completed crochet row usually looks like a series of small V shapes. These V shapes are important because they help you identify where to insert your hook when working the next row. Learning to recognise them is just as important as learning the physical movement of making the stitch.
Step 9: Learn How to Crochet Across a Row and Turn Your Work
After completing your first row of single crochet, you need to learn how to begin another row. At the end of a single crochet row, you normally make a chain of one before turning the work. This small chain gives you the height needed to begin the next row.
Turn the piece around so that you can work back across the row. Insert the hook into the first stitch of the new row and continue making single crochet stitches. Keep working across until you reach the other end.
This is also where many beginners start losing stitches. If you accidentally skip the first or last stitch, your project will become narrower, while adding an extra stitch can make it wider. Count your stitches regularly so that you notice these problems early.
If you begin with 12 stitches, for example, you should normally still have 12 stitches after completing the next row. The exact stitch count depends on the pattern, but keeping track of it helps you understand what is happening to your work. Stitch markers can also help you identify the first or last stitch when you are still learning.
Step 10: Practise Your Tension and Make a Small Swatch
Before rushing into a large project, spend some time making a small practice swatch. A swatch is simply a small piece of crochet that allows you to practise stitches and observe your tension. It does not need to become anything useful, and you can unravel it when you are finished.
Start with around 11 to 15 chains and work several rows of single crochet. Count your stitches at the end of each row and pay attention to whether your fabric is becoming wider, narrower or staying roughly the same width. This simple exercise teaches you to recognise mistakes before they become difficult to fix.
Your first swatch may look uneven, and that is completely normal. Some stitches may be tighter than others, your edges may not be perfectly straight and you may even accidentally create holes in places where they should not be. The important thing is whether the second attempt is better than the first.
Short practice sessions are usually easier on your hands than forcing yourself to crochet for several hours. Practising for 20 to 45 minutes, taking a break and returning later can give you enough repetition without making your hands unnecessarily tired. With repeated practice, the movements that initially require concentration will gradually become more automatic.
Step 11: Make Your First Crochet Project
Once you can make chains and several rows of single crochet, you are ready to make something small. Your first project should be simple enough to finish without becoming frustrated halfway through. Completing a small item is important because it gives you experience with starting, maintaining, finishing and tidying a real project.
Start With a Crochet Coaster or Mug Rug
A coaster is one of the easiest first crochet projects because it is small and does not require much yarn. You can make a simple square or rectangle using single crochet and practise keeping your rows straight. Because the project is small, you can finish it relatively quickly and see the result of what you have learned.
A coaster also gives you a chance to practise counting stitches without committing to a large project. If the shape is slightly uneven, you can still use it, or you can unravel it and try again. Either way, you gain useful experience.
Try a Crochet Dishcloth or Washcloth
A dishcloth or washcloth is another excellent beginner project because it is essentially a simple rectangle. You can use cotton yarn if you want a sturdy and absorbent finished item, although acrylic can also work for practice. Repeating the same stitch across multiple rows helps you develop better tension and learn how to maintain the same width.
This is also a good project for learning how to finish your work properly. Once the final row is complete, you can cut the yarn, secure the end and use your tapestry needle to weave the loose end into the fabric.
Move on to a Simple Scarf
A simple scarf can be a good project once you are comfortable with basic rows. You can make one using single crochet, half double crochet or double crochet without needing complicated shaping. The main challenge is that a scarf is much longer than a coaster, so you need patience and consistency.
Do not feel that your first scarf needs an elaborate stitch pattern. Repeating one basic stitch is enough to create something useful while giving you plenty of practice. Once you are comfortable with the basic movement, you can begin experimenting with different stitches and patterns.
Try a Granny Square
A granny square is a natural next step after simple rows because it introduces you to working in the round. It also gives you an opportunity to experiment with colour changes and basic increases. You can make individual squares and eventually join several of them to create blankets, bags and other larger items.
A granny square may be slightly more challenging than a coaster or dishcloth, so do not worry if it takes several attempts. The purpose is to introduce another way of constructing crochet fabric rather than to prove that you have mastered everything.
What About Hats and Amigurumi?
Simple beanies and amigurumi can be excellent projects, but they are usually better once you understand the basic stitches. They often require working in rounds, increases, decreases or continuous spirals, which adds another level of difficulty. Starting with one of these projects immediately can be frustrating if you are still struggling to keep straight rows.
Once you have completed a few simple projects, however, they become much more approachable. At that stage, you will have better control of the hook and yarn and will be able to focus on understanding the pattern rather than fighting with every stitch.
Common Beginner Crochet Mistakes and How to Fix Them
One of the most common problems is a project that becomes wider or narrower as you work. This usually happens because the crocheter has accidentally added or missed stitches, especially at the beginning or end of a row. Counting your stitches after each row is one of the simplest ways to prevent this.
Another common problem is a foundation chain that is much tighter than the rest of the project. A tight foundation chain can make it difficult to insert the hook and can cause the bottom of the project to pull inward. Try relaxing your tension, and if necessary, use a slightly larger hook to make the foundation chain before switching back to the recommended hook.
Some beginners also make every stitch extremely tight because they are afraid of making mistakes. This can make the hook difficult to insert and can leave the finished fabric stiff. Try allowing the yarn to move more naturally through your fingers instead of pulling each stitch tightly.
If you cannot see your stitches, check the yarn before blaming yourself. Dark, fuzzy or heavily textured yarn can make stitch identification difficult even for experienced crocheters. Switching to a smooth, light-coloured yarn can immediately make the learning process easier.
You may also accidentally twist your chain when attempting to join it into a circle. Before joining, lay the chain flat and make sure all the V shapes are facing the same direction. Taking a few seconds to check this can prevent you from creating a twisted foundation that will be difficult to correct later.
Most importantly, do not be afraid to undo your work. Crocheters often use the term “frogging” for pulling out stitches, and it is a normal part of the craft. If you make a mistake several rows back, undoing the stitches and correcting it is often better than continuing with a mistake that will affect the entire project.
US vs UK Crochet Terms: Why the Same Stitch Can Have Different Names
One detail that can confuse beginners is that crochet patterns do not always use the same terminology. US and UK crochet patterns use different names for some stitches, even though the physical stitches themselves are different. This means you should always check which terminology a pattern uses before you begin.
The most important example is the single crochet. A US single crochet is called a UK double crochet, while a US double crochet is called a UK treble crochet. If you follow a UK pattern while assuming it uses US terminology, you can end up making completely different stitches from the ones the designer intended.
Most patterns will tell you whether they use US or UK terms. If they do not, check the pattern notes or the designer’s website before starting. Once you understand this difference, it becomes much easier to use crochet patterns from different countries.
How to Read a Simple Crochet Pattern
Crochet patterns can look like a different language when you first see abbreviations such as sc, dc, hdc and sl st. These abbreviations simply make repeated instructions shorter. You do not need to memorise them all immediately because you can keep a reference nearby while learning.
Some common abbreviations include ch for chain, sc for single crochet, hdc for half double crochet, dc for double crochet and sl st for slip stitch. You may also see st or sts for stitch or stitches, yo for yarn over and rep for repeat. These terms become familiar naturally as you use more patterns.
Always read the pattern instructions before starting. Look at the recommended yarn, hook size, terminology, stitch count and any special instructions so that you know what the designer expects. A few minutes of preparation can prevent you from having to unravel an entire project later.
Can Left-Handed People Learn Crochet?
Yes, left-handed people can learn crochet just as successfully as right-handed people. Crochet instructions are often demonstrated from a right-handed perspective, which can make some movements look confusing at first. A left-handed beginner can mirror the movement or find tutorials specifically created for left-handed crocheters.
The most important thing is to find a comfortable way to hold the hook and control the yarn. You do not need to force yourself into a grip that feels unnatural simply because another crocheter uses it. Once you find a comfortable position, regular practice will help the movements become easier.
Video tutorials can be particularly useful for left-handed learners because you can watch the movement and reproduce it in the orientation that feels natural to you. You can also slow videos down or replay difficult sections until the movement makes sense.
How Long Does It Take to Learn Crochet?
There is no single amount of time that everyone needs to learn crochet. Some people can understand the basic movements within their first session, while others need several practice sessions before their hands begin to cooperate. The important thing is to measure progress by what you can do, rather than by how quickly someone else learned.
During your first session, you may spend most of your time learning how to hold the hook, make a slip knot and create chains. After that, you can begin practising single crochet and turning rows. With regular practice, you should gradually find that you spend less time thinking about every movement.
The biggest change often comes when the movements begin to feel automatic. You stop concentrating on every yarn over and start paying more attention to the shape of your project. That is when crochet usually starts feeling much easier.
Where Can Beginners Learn Crochet for Free?
Video tutorials are one of the best free ways to learn crochet because crochet is a physical skill. Watching someone’s hands can make it much easier to understand where the hook goes, how the yarn moves and what a completed stitch should look like. YouTube has many beginner-focused tutorials covering everything from slip knots to complete projects.
When choosing a tutorial, look for phrases such as “absolute beginner”, “crochet for beginners”, “first crochet project” or “single crochet tutorial”. A good beginner tutorial should move slowly enough for you to follow and show the hook and yarn clearly. Tutorials specifically designed for left-handed crocheters can also make learning easier if you are left-handed.
Written patterns and crochet websites become increasingly useful once you understand the basic stitches. Websites such as Ravelry and many independent crochet blogs provide patterns ranging from very simple projects to advanced designs. Start with patterns labelled “beginner” or “easy” and check the required stitches before choosing one.
Beginner Crochet Habits That Will Make Learning Easier
Good lighting makes a bigger difference than many beginners expect. You need to be able to see the individual loops clearly, especially when learning where to insert the hook. A comfortable chair and a sensible working position can also make longer practice sessions easier.
Try to keep your hands relaxed. Beginners often grip the hook and yarn tightly because they are concentrating, but excessive tension makes the stitches harder to work and can make your hands tired. The more comfortable you become, the more naturally your hands will control the yarn.
Count your stitches regularly, particularly when making rows. If your stitch count changes, stop and find the problem instead of continuing for several more rows. Fixing a mistake immediately is usually much easier than trying to discover where the project changed shape much later.
Do not judge your ability by your first project. The finished crochet pieces you see online may have been made by people who have spent years developing their skills, while you are looking at your first few hours of practice. Your early work is supposed to teach you, and uneven stitches are part of that learning process.
A Simple 7-Day Plan for Learning Crochet
Day 1: Get Comfortable With Your Tools
Spend the first day getting familiar with your hook and yarn. Practise holding the hook, controlling the yarn and making slip knots without worrying about starting a project. The goal is simply to make the basic movements feel less strange.
Day 2: Practise Chain Stitches
Spend your second session making chains of around 15 to 30 stitches. Pull them apart and make them again if necessary, paying attention to whether your loops are becoming more even. By the end of the session, you should have a better understanding of how tightly or loosely you need to hold the yarn.
Day 3: Learn Single Crochet
Use a foundation chain to practise single crochet. Work across the chain slowly and focus on identifying where the hook should enter. Do not worry if the first row looks uneven.
Day 4: Learn to Turn and Work Rows
Practise completing a row, making the turning chain and starting the next row. Count your stitches after each row so you can learn how to keep the same number throughout the project. This is also a good time to practise identifying the first and last stitches.
Day 5: Make a Practice Swatch
Create a small rectangle using single crochet. Focus on keeping the edges straight and the stitches reasonably similar in size. If you make mistakes, undo the work and try again rather than becoming discouraged.
Day 6: Start Your First Project
Choose something small, such as a coaster, mug rug or simple dishcloth. The goal is not to make something perfect but to take the skills you have practised and use them to create a finished item.
Day 7: Finish and Review
Complete the project and weave in the loose ends with a tapestry needle. Look at the finished piece and compare it with your earliest practice attempts. Even if it is not perfect, you will probably notice that your stitches are more consistent than when you started.
What Should You Learn After Your First Crochet Project?
Once you are comfortable with single crochet, you can gradually add more stitches to your skill set. Half double crochet is a useful next step because it creates a taller stitch, while double crochet creates even taller fabric and allows projects to grow more quickly. Slip stitch is also important for joining pieces, finishing edges and moving across stitches.
After becoming comfortable with basic stitches, learn how to work in rounds. This opens the door to granny squares, hats, bags and many other projects. You can then learn increases and decreases, which allow you to change the shape of your crochet rather than simply making flat rectangles.
You can also learn techniques such as the magic ring, colour changes and more advanced pattern reading. Gauge becomes increasingly important when you make items that need to fit a particular size, such as hats, sweaters and other clothing. There is no need to learn all of these techniques at once, because each new skill becomes easier when it builds on something you already understand.
Frequently Asked Questions
What do I need to start crochet?
You only need a crochet hook, suitable yarn, scissors and a tapestry needle to begin. A 5 mm or 5.5 mm hook paired with smooth medium-weight yarn is a practical starting combination. Stitch markers and other accessories can be added later.
What is the best crochet hook size for beginners?
A 5 mm or 5.5 mm hook is a good starting point for many beginners. These sizes work well with medium or worsted-weight yarn and create stitches that are relatively easy to see. Always check the yarn label or project instructions for the recommended hook size.
What is the best yarn for crochet beginners?
Smooth, light-coloured, medium-weight or #4 worsted yarn is one of the easiest choices for beginners. Acrylic is particularly practical because it is affordable, durable and easy to unravel when you make mistakes. Avoid fuzzy, very thin, very dark and heavily textured yarn until you are more comfortable.
Is crochet difficult to learn?
The basic movements of crochet are not particularly complicated, but they can feel awkward when you first start. Most of the early difficulty comes from learning how to hold the hook, control the yarn and maintain consistent tension. Regular practice makes these movements increasingly natural.
Can I teach myself crochet?
Yes, many people learn crochet by themselves using books, written patterns and video tutorials. Video is particularly useful because you can see exactly how the hook and yarn move. Starting with beginner tutorials that teach the slip knot, chain and single crochet can give you a strong foundation.
What is the easiest crochet stitch?
Single crochet is one of the easiest and most useful stitches for beginners. It requires a simple sequence of inserting the hook, yarning over, pulling up a loop, yarning over again and pulling through both loops. It is also useful for many simple projects.
What should I crochet first?
A coaster, mug rug or small dishcloth is an excellent first project. These projects are small enough to finish quickly and simple enough to let you focus on tension and stitch counting. Once you are comfortable, you can move on to scarves, granny squares, hats and other projects.
How long does it take to learn crochet?
The basic movements can be introduced within your first few practice sessions, but becoming comfortable takes longer. Your speed, tension and stitch recognition will improve as you complete more projects. Instead of worrying about a specific number of hours, focus on practising regularly and making each project slightly better than the previous one.
Is crochet easier than knitting?
Crochet and knitting use different tools and techniques, so which one feels easier depends on the person. Crochet uses one main hook rather than two knitting needles, and many beginners find the basic stitches straightforward to learn. The best way to know which you prefer is to try it yourself.
Can left-handed people learn crochet?
Absolutely. Left-handed people can learn crochet by mirroring demonstrations or following tutorials designed specifically for left-handed crocheters. The most important thing is finding a comfortable grip and a method that allows you to control the yarn and hook.
Conclusion
Starting crochet does not require a large investment or a complicated collection of supplies. Get a 5 mm or 5.5 mm hook, choose a smooth light-coloured #4 medium-weight yarn, and keep a pair of scissors and a tapestry needle nearby. Then focus on the three basic skills that will form the foundation of almost everything you do later: the slip knot, the chain stitch and the single crochet.
Do not rush into a complicated blanket, sweater or detailed amigurumi because you think that is what a “real” crocheter should make. Start with a coaster or small dishcloth, practise your tension, count your stitches and allow yourself to make mistakes.
The first time you finish a small project, you will have something more valuable than a perfect piece of crochet, you will have proof that you can take a strand of yarn and turn it into something with your own hands.